For all of us who deal with long web pages and need to scroll to the top for the menu,
here’s a nice alternative: floating menus that move as you scroll a page. This is done
using HTML, CSS and jQuery, and it’s fully W3C-compliant.
View floating menu samples here
This tutorial covers how to create a “floating menu” using HTML, CSS, and jQuery. To
reiterate, a floating menu stays visible even if you scroll down a web page. They’re
animated, so they move up and down as you scroll the browser window up or down. I am
going to show you how to make a floating menu using jQuery and CSS, and hopefully make
some new jQuery disciples 😀 .
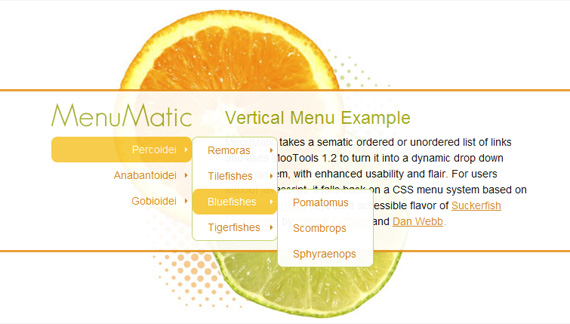
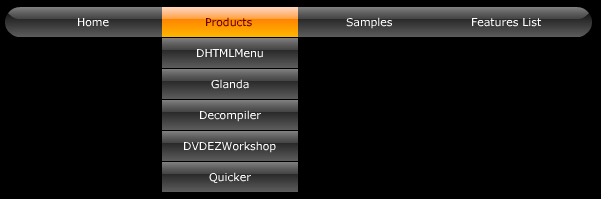
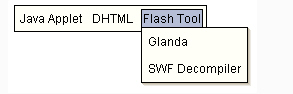
Before we continue to the coding steps, have a look at the two screen snaps below. The
first shows a web page with a floating menu at top right. Of course, you can’t tell it’s
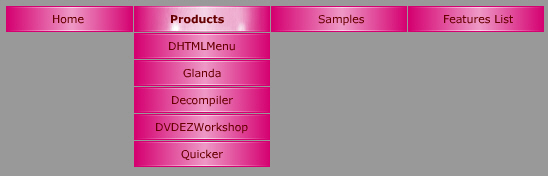
floating until you see it live and actually scroll the page. So look at the second
snapshot, and you can see that the menu has moved.
Figure 1

Figure 2

Step 1
Let’s start with the HTML markup for a nice menu consisting of three sub-menus:
view plaincopy to clipboardprint?
<div id=”floatMenu”>
<ul>
<li><a href=”#” onclick=”return false;”> Home </a></li>
</ul>
<ul>
<li><a href=”#” onclick=”return false;”> Table of content </a></li>
<li><a href=”#” onclick=”return false;”> Exam </a></li>
<li><a href=”#” onclick=”return false;”> Wiki </a></li>
</ul>
<ul>
<li><a href=”#” onclick=”return false;”> Technical support </a></li>
</ul>
</div>
This is the basic markup we will use. The main part in this bit of HTML is the <div id=”
floatMenu”>…</div> in Line 01, which encapsulates the whole menu. The three lists are
only used to demonstrate structure, which can be modified to suit your needs. In this
case, there are three sections to the menu, as represented by three unordered HTML
lists.
As a matter of habit, I disable the click on dummy links (href=”#”). Just to be sure
that a click on a dummy link doesn’t send the page back to the top, there is also an
onclick=”return false;” in <a href>. This method allows to add menu item features such
as lightboxing – something that requires the page to stay at its current vertical
position when the user clicks on a menu link.
Step 2
Now we need some CSS rules to skin and position the menu. (I used Eric A. Meyer’s CSS
Reset, so that’s why there is no margin:0 or padding:0 on the ul element):
view plaincopy to clipboardprint?
body {
background-color:#000;
height:2000px;
color:#ccc;
font:10px “Lucida Grande”, “Lucida Sans”, “Trebuchet MS”, verdana, sans-serif;
}
#floatMenu {
position:absolute;
top:150px;
left:50%;
margin-left:235px;
width:200px;
}
#floatMenu ul {
margin-bottom:20px;
}
#floatMenu ul li a {
display:block;
border:1px solid #999;
background-color:#222;
border-left:6px solid #999;
text-decoration:none;
color:#ccc;
padding:5px 5px 5px 25px;
}
The body height (Line 03, above) has been set only to get enough room for our menu to
scroll up and down with the page. This should be removed in a real case scenario. The
two other things to take note of are the position:absolute (Line 08) and the left:50%
(Line 10), both in the #floatMenu CSS rule (Line 07), above.
The “position” attribute is used when you need to remove an element from the flow of the
document and keep it at a precise place in your page. If you use the text zoom function
of your browser, an element with absolute positioning will not move, even if the text
around it increases in size.
The “left” attribute is used to position the specific div element horizontally. The
value needs to be defined as a percentage in the case that we want a centered design.
With a 50% value, the left side of the container is positioned in the middle of the
page. To position it left or right we need to use the “margin-left” attribute (Line 11),
with a negative value for an offset to the left and a positive one for an offset to the
right.
The others elements in the above stylesheet rules customize the visual design.
Step 3
Now we have a menu of three sections positioned in the upper right hand side of the
page. To enhance the menu item roll-over effect, let’s add style classes menu1, menu2
and menu 3 to each menu section, respectively (to each <ul> element). We will have 3
distinct sub-menus using our 3 <ul> tags. The code below is a modification of the HTML
code shown in Step 1 above:
view plaincopy to clipboardprint?
<div id=”floatMenu”>
<ul>
…
</ul>
<ul>
…
</ul>
<ul>
…
</ul>
</div>
Now let’s define some CSS hover-based roll-over effects, which will be different for
each menu section.
view plaincopy to clipboardprint?
#floatMenu ul.menu1 li a:hover {
border-color:#09f;
}
#floatMenu ul.menu2 li a:hover {
border-color:#9f0;
}
#floatMenu ul.menu3 li a:hover {
border-color:#f09;
}
Now each menu section will display a different color when the mouse hovers over a menu
item. If you like, you can also add rules for other menu link states using :link,
:visited, :hover and :active pseudo classes. The order in which you should write them
can be easily memorized like this: LoVe and HAte, where the capitalized letters
represents the first letter of each state.
Step 4
We’ve got a nice looking menu and could stop here, but we do want that floating menu, so
it’s time to add some jQuery. You’ll need to download the jQuery library and the
Dimensions plugin. This plugin will be used to grab information about the browser’s
window (width, height, scroll, etc.). You can link to both bits of jQuery code from your
HTML file in the <head>…</head> section. Just remember to change the URL path according
to where on your server you place the jQuery library and plugin files.
view plaincopy to clipboardprint?
<script language=”javascript” src=”jquery.js”></script>
<script language=”javascript” src=”jquery.dimensions.js”></script>
We’ll need some custom jQuery code as well, so start a new <script> section, also within
the <head>…</head> section of your HTML document:
view plaincopy to clipboardprint?
<script language=”javascript”>
.
</script>
Add the following jQuery code inside the the <script> section:
view plaincopy to clipboardprint?
$(document).ready(function(){
// code will go here
});
The $(document).ready() function is similar to the window.onLoad but improved. With the
window.onLoad function, the browser has to wait until the whole page (DOM and display)
is loaded. With the $(document).ready() function, the browser only waits until the DOM
is loaded, which means jQuery can start manipulating elements sooner.
Step 5
We need a listener for the “scroll page” window event. Our custom jQuery script now
looks like this:
view plaincopy to clipboardprint?
$(document).ready(function(){
$(window).scroll(function () {
// code will go here
});
});
A listener is an event handler waiting on standby for a particular window event to
happen – in this a page scroll up or down.
Step 6
Since our menu will “float” as the page is scrolled, we need to track its initial
position. Instead of hard-coding that into the jQuery, we’ll read it’s position using
the Dimensions jQuery plugin, then use the retrieved value. We will do the same with the
name of our menu. Let’s add two variable definitions (Lines 01, 02) so that our code now
looks like this:
view plaincopy to clipboardprint?
var name = “#floatMenu”;
var menuYloc = null;
$(document).ready(function(){
menuYloc = parseInt($(name).css(“top”).substring(0,$(name).css(“top”).indexOf
(“px”)))
$(window).scroll(function () {
// code will go here
});
});
Lines 01 and 02 define variables “name” and “menuYloc”. Line 05 sets the value of
“menuYloc”. The “name” variable will be used to reference our floating menu. The
“menuYloc” variable will contain the original vertical position of our menu.
Let’s look at how the value of menuYloc is set in Line 05. This statement is an example
of jQuery’s powerful function-chaining. First we read the “top” attribute value from the
CSS rules of our menu element (which is “150px”, set in Step 2). Then we strip off the “
px” string at the end, since we only need the “150? part. To do this, the jQuery function
call .css(“top”) first finds the value of the top attribute for the menu. (This
attribute was set in Line 09 of the code in Step 2, above.) That results in retrieving
the value “150px”. Then the .indexOf() function finds where the “px” in “150px” starts,
and the .substring() function ensures we save everything before the “px”. The .parseInt
() function turns the string “150? into an numeric integer value.
Step 7
We now arrived at the fun part of this tutorial: animating the menu to make it “float”.
To do this, we need to determine how far the page has scrolled in pixel dimension. We
have the original menu location stored in variable “menuYloc”. We need the offset of the
scroll bar, which we can get from the command $(document).scrollTop(), defined in the
Dimensions jQuery plugin. After grabbing the offset we can add the animate command.
Lines 07 and 08, below, show the new code:
view plaincopy to clipboardprint?
var name = “#floatMenu”;
var menuYloc = null;
$(document).ready(function(){
menuYloc = parseInt($(name).css(“top”).substring(0,$(name).css(“top”).indexOf
(“px”)))
$(window).scroll(function () {
var offset = menuYloc+$(document).scrollTop()+”px”;
$(name).animate({top:offset},{duration:500,queue:false});
});
});
The variable “offset”, in Line 07 above, contains the difference between the original
location of the menu (menuYloc) and the scroll value ($(document).scrollTop()), in pixel
measurement. To make it work as a CSS rule, we add the necessary measurement unit, “px”,
after the numeric value. Now we can apply the vertical offset, as calculated, to
position the menu and thus making it move.
To make it all look nicer, let’s make use of jQuery’s animation options. We’ve stored
the menu name in the variable “name” and can recall it when needed, to use it along with
the .animate() function. The animate function requires two parameters: (1) the style
properties, and the (2) animation options. In this tutorial, we just need to animate the
“top” CSS property, but to specify additional parameters, separate each property:value
pair with a comma (,).
We’re using two parameters here. The “duration” is the length of the animation
in milliseconds, and the “queue” is a list of all positions we want our object to be
animated to. Since we only want to animate our object to its final location (the browser
’s current scroll location), we set “queue” to false.
We should now have a functioning floating menu.


 Buy or sell a logo
 iOS Data Recovery
 Mobile Data Transfer